Nearly four years ago, I wrote a post a on how to configure ServiceNow to call the Ansible Automation platform . In that post, I made use of outbound REST API calls in ServiceNow along with worfklows. The ServiceNow Ansible Spoke gives customers another method for integrating ServiceNow with Ansible Automation Platform. The Ansible Spoke provides some out of the box integrations with automation controller (formally Ansible Tower) to streamline the integration process. Please note that you’ll need access to the Professional or Enterprise integration hub in ServiceNow.
I was able to test the Ansible Spoke and wanted to do a quick write-up. As with the last post I wrote on ServiceNow integration, I relied a lot on existing content to get me going. I’ll call out the examples I used as I go along.
NOTE As with my previous post, I am still not a ServiceNow expert! This is just an example guide.
Overview of the setup
We often see customers wanting to automate service requests from the ServiceNow service catalog. This diagram shows the “closed loop” automation which provides zero-touch fulfillment of services to users while integrating with and maintaing existing ITIL processes - change management, incident management and CMDB.

In this example we will use the ServiceNow Service Catalog to provide a service that allows users to install a monitoring agent onto their Linux server. The request will:
- Provide the user with a drop-down box that asks for the target Linux server - this prompt should query the Linux table in the CMDB to give the user a list of valid hosts.
- Provide a drop-down box that queries a custom table to provide the user with a list of available monitoring profiles to assign to their Linux server.
Once the request is approved, ServiceNow will call the automation controller API using the Ansible Spoke to fulfill the request. Ansible should then go back the other way - updating the request in ServiceNow to confirm that it completed the request.
Installing and configuring the Ansible Spoke
I’m not going to document this process as I’ll just be repeating existing information out there. The Ansible Spoke setup documentation provides a comprehensive guide for configuring both ServiceNow and automation controller. There is also an excellent guide that some Red Hat colleagues wrote - it covers the initial setup in a lot of detail.
Create the Catalog Item
For the next steps - I re-use a lot of content from a great recording on youtube by Alex Dworjan. This goes into a lot of detail.
The first step is to create a catalog item. In ServiceNow, navigate to maintain items and create a new catalog item. Enter a name, select the catalog and category for the item. Hit save to continue.

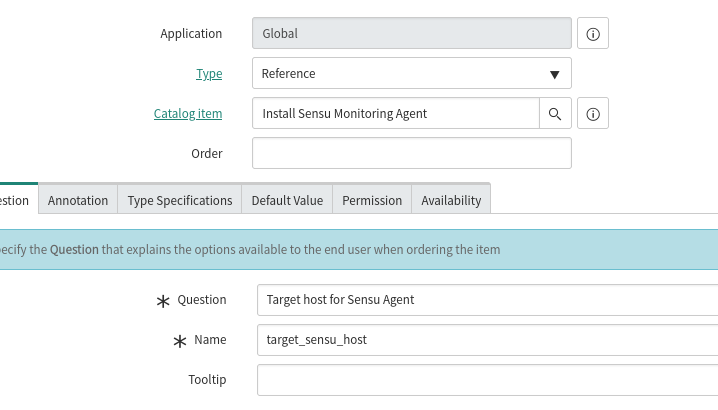
Next we can create the prompts for the user - this will be a lookup on the CMDB so that the user can select a target Linux server for the monitoring agent. Add a new variable of type Reference. Enter the question that the user should be prompted for when.
For the CMDB lookup we can use the Linux table in the CMDB. This will give a drop-down box to select from available Linux hosts in the CMDB. Here is the type specification.
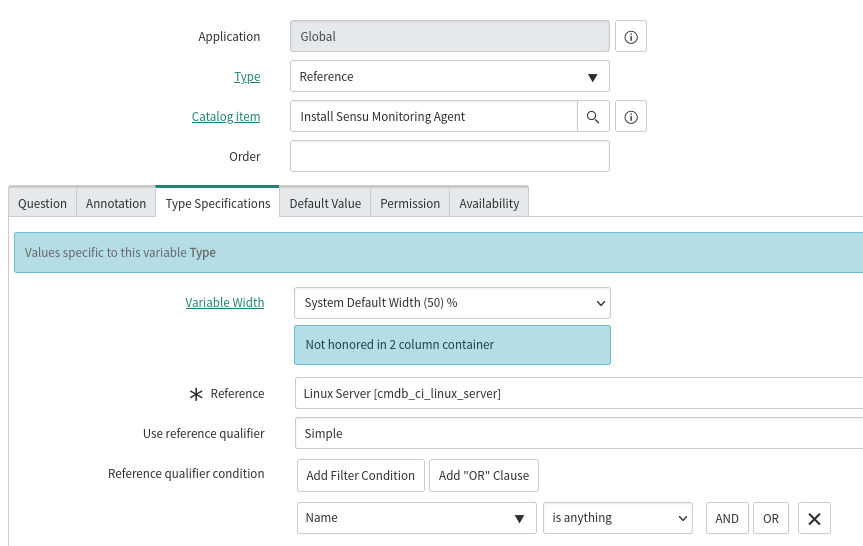
Repeating these steps for the monitoring agent profile gives us the two questions we need the user to answer. Now we can move on to the flow design.
Build Flow using Ansible Spoke
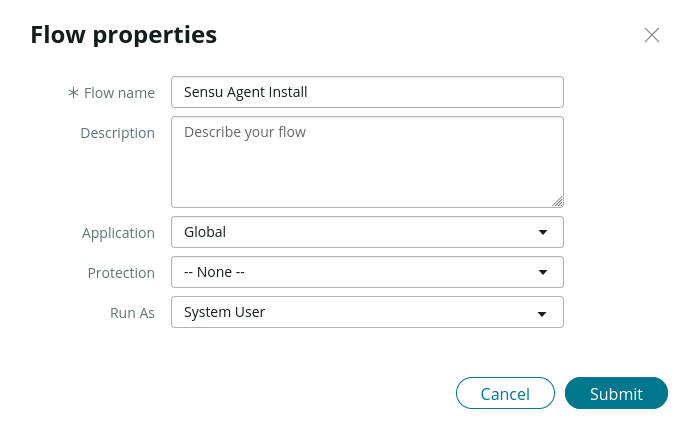
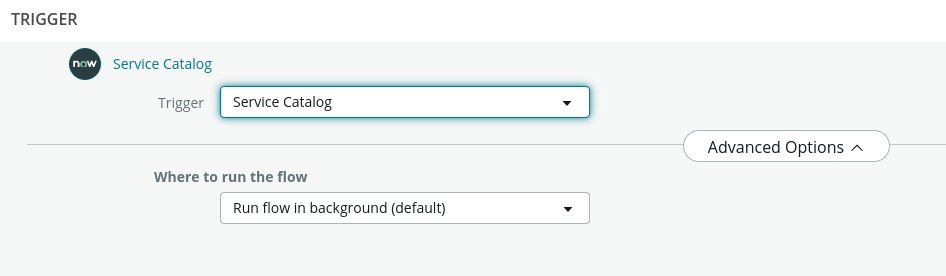
In ServiceNow navigate to flow designer and add a new flow. Name the flow and press submit.
Select a trigger for the flow - in this example we want to use the Service Catalog to trigger the flow. Press done to move to the next step.
Next we can look at the actions we want the flow to run. The first step is to gather the inputs from the catalog form so that we can pass the variables to automation controller. Add an action of Get Catalog Variables. Set the submitted request to be the requested item by using the data picker or drag and drop the Request item record from the right-hand pane.
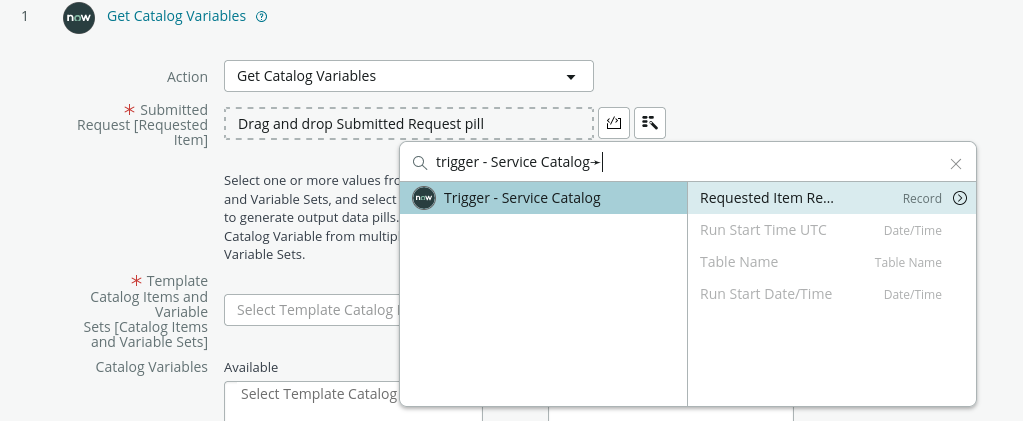
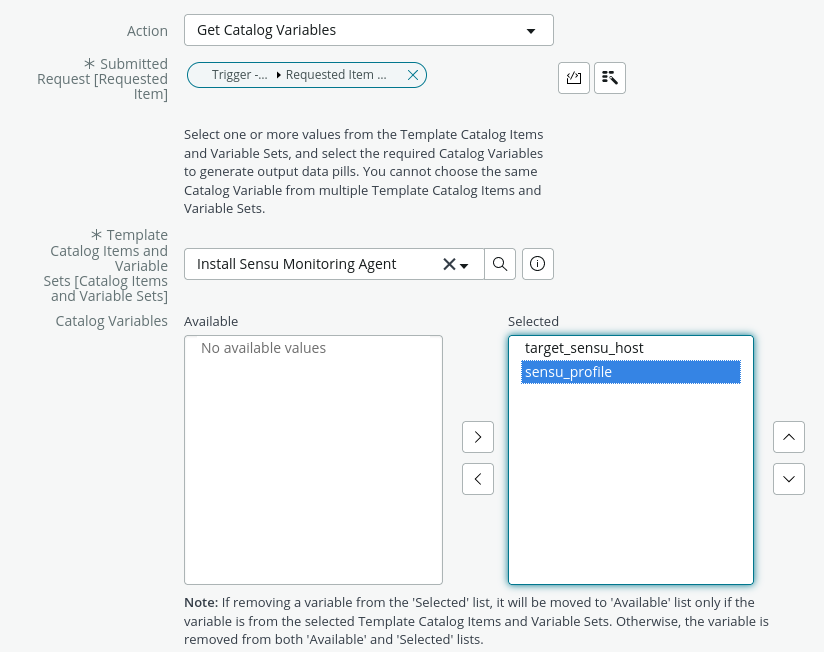
You should now see the variables that we added in the previous step when we created the catalog item. Select both variables and add them. Press done to move to the next action.
Now that we have gathered the variables, we can launch a job in automation controller. This is where we will use the Ansible Spoke. Add another action, select Ansible Spoke from the installed spokes and then scroll down the list on the right and pick launch job template. You’ll be prompted to fill in some fields.
-
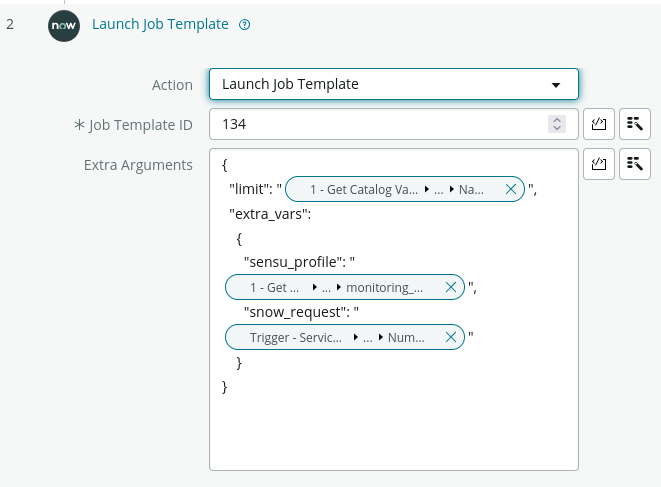
Job template ID - you can find this ID number in automation controller. In the automation controller UI, go to Templates, select the relevant job template that you want to launch and look at the URL to find the job ID. For example https://automation-controller.demolab.local/#/templates/job_template/134/details tells me that the job ID is 134. Enter this ID into the field in ServiceNow.
-
Extra Arguments - this is where we pass additional data to the automation controller API. In our case we need to pass the target host as the limit so that the job only runs against a single host. We also need extra_vars to pass along the monitoring profile to use as well as the ServiceNow request ID. The ServiceNow request ID is needed so that Ansible can go back to ServiceNow and update the request. Here is an example of the extra data:
{
  "limit": "<place for target host>",
  "extra_vars":
    {
      "sensu_profile": "<place to put monitoring profile var>",
      "snow_request": "<place to put snow request id>"
    }
}
We can copy this data into the extra arguments field. Removing the placeholders, we can use the data picker to pick the right variables for the target host and monitoring profile. These came from the Get Catalog Variables stage. The ServiceNow request comes from the Trigger - Service Catalog step.

Here are the fields:
| Name | Variable lookup | Notes |
|---|---|---|
| limit | Get catalog variables -> target_sensu_host -> Name | CMDB Lookup |
| sensu_profile | Get catalog variables -> sensu_profile -> monitoring profile | Custom table |
| snow_request | Trigger Service Catalog -> Requested Item Record -> Number | Service Request Data |
The completed extra arguments should look as follows.
Press Save and then Activate to complete the flow design stage.
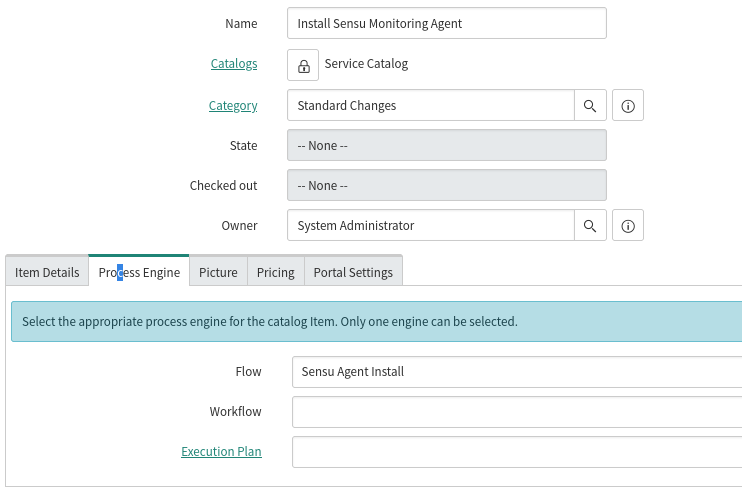
Add flow to catalog item
With the flow completed, we can add it to the catalog item. In ServiceNow, go back to maintain items and select the relevant catalog item that we created earlier. Select the Process Engine and select the new flow that we created.
Testing the flow - video
This short video shows a demo of the integration.