Another post on inventory filtering in Ansible - this time for Red Hat Satellite. I’ve written about inventories and filtering in a few places so for some background information you can read these posts on constructed inventory plugins, VMware filtering and on ansible.com/blog around the servicenow plugin. Put simply, Ansible inventory plugins allow you to query a “Source of Truth” so that you can:
- Effectively and efficiently maintain a list of all of your managed nodes for Ansible.
- Classify and group your infrastructure so that you can be more selective in what devices you automate against?
There are a bunch of inventory plugins shipped with Ansible including AWS EC2, Microsoft Azure, VMware vCenter and Red Hat Satellite. Again, see the posts I linked earlier to learn more about inventory plugins.
I was helping a colleague out with how to filter Satellite hosts with the Ansible inventory plugin and he commented that there weren’t any real examples out there. It then struck me that I couldn’t remember much on the subject myself! So it was worth just writing this up quickly as a reminder for me if for no-one else. Red Hat Satellite is a tool that customers use to manage RHEL content and patching of RHEL servers. RHEL servers are registered to Satellite and so it is often a very useful “Source of Truth”.
Getting started with the plugin
Let’s take a look at the inventory plugin for Red Hat Satellite. We ship the plugin with Ansible 2.9 but it is also a supported plugin from the redhat.satellite collection on cloud.redhat.com. So how do we use the inventory plugin and what parameters can we set? ansible-doc is our friend here. Note that the plugin is called foreman because this is the name of one of the upstream projects for Red Hat Satellite. To query the inventory plugin docs run:
ansible-doc -t inventory foreman
If you intend to run the plugin from the Red Hat Satellite collection then you need the fully qualified collection name. For the officially supported Red Hat Satellite collection this would be:
ansible-doc -t inventory redhat.satellite.foreman
Let’s just get the plugin working and verify the information it returns. Create the foreman.yml file with the following contents - don’t worry about the credentials being in plaintext yet. We can fix that later in Tower. I’m going to use the certified and supported Red Hat Satellite foreman plugin here - again note the fully qualified collection name:
cat foreman.yml
# foreman.yml
plugin: redhat.satellite.foreman
validate_certs: False
url: https://sat6.example.com
user: ansible
password: Redhat123
Now run the plugin. First, let’s see the groups that are returned:
ansible-inventory -i foreman.yml --graph
@all:
  |--@foreman_dev_web:
  |  |--dev-web1.example.com
  |--@foreman_prod_haproxy:
  |  |--lb.example.com
  |--@foreman_prod_web:
  |  |--prod-web1.example.com
  |  |--prod-web2.example.com
  |--@ungrouped:
Next let’s look at the variables that are being returned for one of these servers. In this instance prod-web2.example.com:
ansible-inventory -i foreman.yml --host prod-web2.example.com

"foreman_architecture_name": "x86_64",
    "foreman_build": false,
    "foreman_capabilities": [
        "build"
    ],
    "foreman_certname": "prod-web2.example.com",
    "foreman_comment": null,
    "foreman_compliance_status": 0,
    "foreman_compliance_status_label": "Compliant",
    "foreman_compute_profile_id": null,
    "foreman_compute_profile_name": null,
    "foreman_compute_resource_id": null,
    "foreman_compute_resource_name": null,
    "foreman_content_facet_attributes": {
        "applicable_module_stream_count": 0,
        "applicable_package_count": 0,
        "content_source": {
            "id": 1,
            "name": "sat6.example.com",
            "url": "https://sat6.example.com:9090"
        },
        "content_source_id": 1,
        "content_source_name": "sat6.example.com",
        "content_view": {
            "id": 7,
            "name": "rhel8"
        },
        "content_view_id": 7,
        "content_view_name": "rhel8",
        "errata_counts": {
            "bugfix": 0,
            "enhancement": 0,
            "security": 0,
            "total": 0
        },
        "lifecycle_environment_name": "Prod"

....
The above output is truncated, but you can see the type of data that Satellite returns. It is possible to modify the behaviour of the plugin, for example to filter certain hosts that we might not need to automate against. We also might want to create additional groups based on the information that is returned from Satellite. As per the ansible-doc output, we can use the following parameters to do this:
- host_filters
        This can be used to restrict the list of returned host
        [Default: (null)]
        type: string

- keyed_groups
        Add hosts to group based on the values of a variable.
        [Default: []]
        type: list
Adding Groups
First, we are going to add some more groups based on data we are receiving from Satellite. We got lots of data back from Satellite so let’s use that to construct some additional groups. In this example, we will build groups based on operating system and lifecycle environment. The updated foreman.yml file now looks like this:
cat foreman.yml
# foreman.yml
plugin: foreman
validate_certs: False
url: https://sat6.example.com
user: ansible
password: Redhat123
keyed_groups:
-  key: foreman_operatingsystem_name | lower | regex_replace(' ', '') | regex_replace('[^A-Za-z0-9_]', '_')
   separator: ''
   prefix: ''
-  key: foreman_content_facet_attributes.lifecycle_environment_name | lower
   prefix: 'lifecycle_env_'
   separator: ''
Note how we have used some regex to ensure the operating system name is converted into a valid group name by removing spaces and other invalid characters. If we re-run the plugin we should now see some additional groups:
ansible-inventory -i foreman.yml --graph
@all:
  |--@foreman_dev_web:
  |  |--dev-web1.example.com
  |--@foreman_prod_haproxy:
  |  |--lb.example.com
  |--@foreman_prod_web:
  |  |--prod-web1.example.com
  |  |--prod-web2.example.com
  |--@lifecycle_env_dev:
  |  |--dev-web1.example.com
  |--@lifecycle_env_prod:
  |  |--lb.example.com
  |  |--prod-web1.example.com
  |  |--prod-web2.example.com
  |--@redhat8_2:
  |  |--dev-web1.example.com
  |  |--lb.example.com
  |  |--prod-web1.example.com
  |  |--prod-web2.example.com
  |--@ungrouped:
Filtering hosts
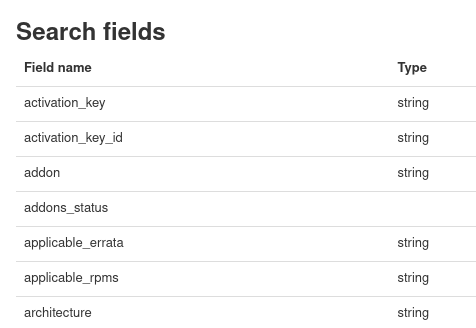
As well as adding groups, we can also filter hosts so that they aren’t added into the Ansible inventory. To do this we need to understand what we can filter on. We can’t just use the variables that were returned from the inventory plugin because the host_filter performs searches against the Satellite API. To see the fields we can search on we can look at the Satellite API documentation which is hosted on the Satellite server itself. For my Satellite server the apidoc for hosts is - https://sat6.example.com/apidoc/v2/hosts/index.html. Here we can see a list of possible searches and this screenshot shows a few examples:
We want to filter on lifecycle environment so we need to do this either by name or ID as per the API docs for Satellite:

Here is the updated foreman.yml file including a filter so that we only get servers in the “Dev” lifecycle environment:
# foreman.yml
plugin: redhat.satellite.foreman
validate_certs: False
url: https://sat6.example.com
user: ansible
password: Redhat123
keyed_groups:
-  key: foreman_operatingsystem_name | lower | regex_replace(' ', '') | regex_replace('[^A-Za-z0-9_]', '_')
   separator: ''
   prefix: ''
-  key: foreman_content_facet_attributes.lifecycle_environment_name | lower
   prefix: 'lifecycle_env_'
   separator: ''
host_filters: 'lifecycle_environment="Dev"'
Running this now only returns a single host in our Dev lifecycle environment:
ansible-inventory -i foreman.yml --graph
@all:
  |--@foreman_dev_web:
  |  |--dev-web1.demolab.local
  |--@lifecycle_env_dev:
  |  |--dev-web1.demolab.local
  |--@redhat8_2:
  |  |--dev-web1.demolab.local
  |--@ungrouped:
Running the inventory plugin in Tower
I’ve been using Ansible Engine and the command line so far. Running the plugin from Ansible Tower is straightforward and gives us the added bonus of encrypting the credentials that we previously had in plaintext. Tower ships with the foreman inventory plugin ready to run and is configured to correct some common groups out of the box. Let’s walk through a basic setup in Tower:
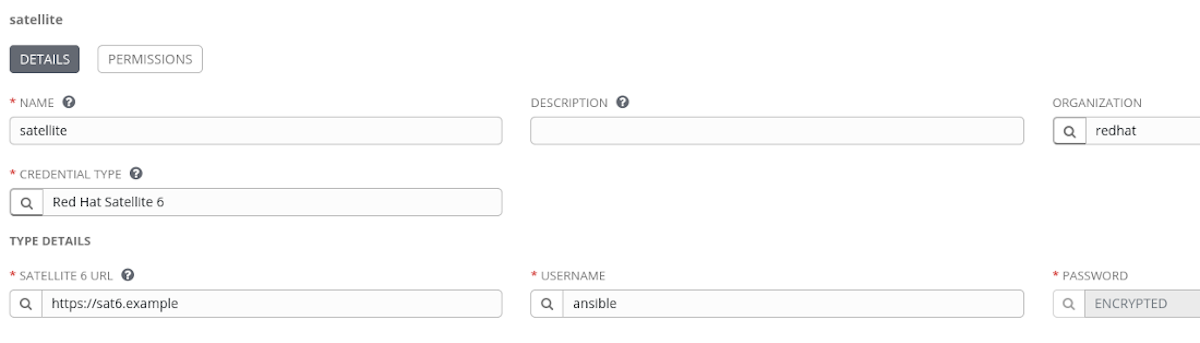
- Create a credential for Red Hat Satellite. As mentioned, Tower can securely store our credential for us so we don’t need to worry about it. In the Tower UI create a credential of type “Red Hat Satellite 6”. Enter the username, password and Satellite URL.
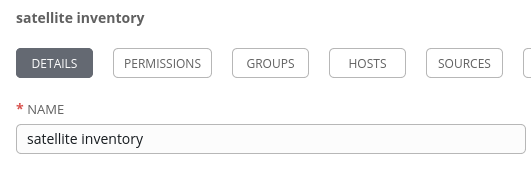
- Create an Inventory. I’ll simply call mine “Satellite inventory”.
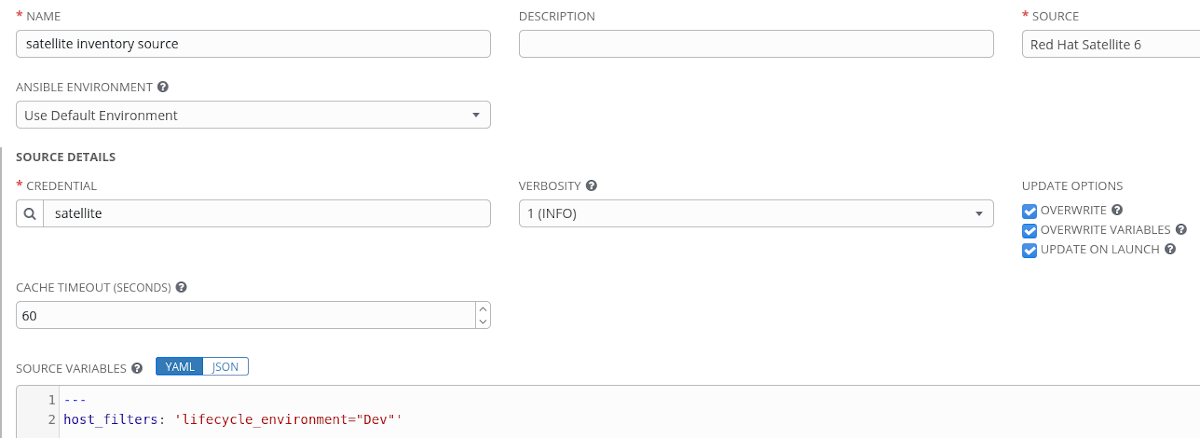
- Add an inventory source to the inventory with the custom filter. The source should be set to “Red Hat Satellite 6” and select the credential we created earlier. We need to include the filter in the “SOURCE VARIABLES” section. A reminder that the available filters can be found at https://sat6.example.com/apidoc/v2/hosts/index.html as explained earlier in the “Filtering Hosts” section.
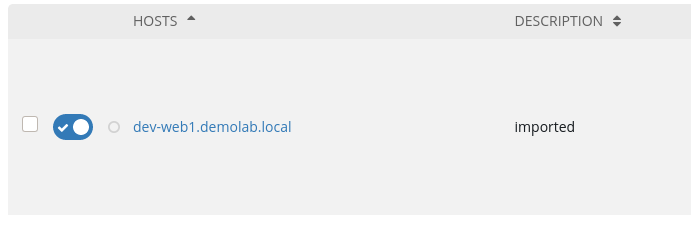
Hitting the “Sync All” button will test the configuration and import out hosts from Satellite. We should only see our single Dev server again.
Next Steps
If you find that you want to further customise the inventory plugin then take a look at my other post on sourcing inventories from collections in Tower as this includes details on sourcing the inventory configuration from source control where you can have full control of the inventory sync.
There are also a lot more inventory plugins available in Ansible. Head over to the Ansible docs to find a list of plugins available in Ansible 2.9.
Finally, with the move to collections, you will find more inventory plugins shipped with their respective collection. For community collections have a look at galaxy.ansible.com. If you are a Red Hat Ansible Automation Platform customer then have a look in the Automation Hub for a list of certified and supported collections.